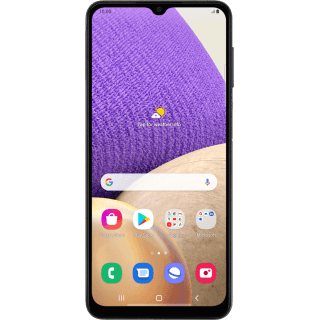
How To Take Screenshots on Samsung A32 5G?
In the world of smartphones, screenshots have become a much-needed tool for capturing moments, sharing information, resolving issues, and clearing misunderstandings. If you are the proud owner of a Samsung A32 5G and are facing challenges while taking a screenshot, you’re in luck! This comprehensive guide will walk you through nine different methods of how to take screenshots on Samsung A32 5G, ensuring that you’re equipped to capture every memorable moment and share valuable content.
Methods To Take Screenshots On Samsung A32 5G:
By Using The Power and Volume Down Buttons:
The conventional method of using the Power and Volume Down buttons remains one of the simplest ways to capture a screenshot. Below is the complete procedure to take a screenshot using the above method. Locate the Power button, situated on the right side of your device, and the Volume Down button, placed on the left side.
Simultaneously press and hold both buttons for a short moment.
You’ll hear a distinct sound and see an animation on the screen, indicating a successful screenshot capture. Moreover, you can access the captured screenshot in the Screenshots folder within your Gallery app.
Palm Swipe Gesture – A Touchless Technique To Take Screenshots On Samsung A32 5G:
For a hands-free approach to taking screenshots, the Palm Swipe Gesture is the way to go. This method can be used by following the below steps: Head to Settings > Advanced Features > Motions and Gestures to enable the Palm Swipe Gesture feature. Gently touch the screen with your palm and swipe horizontally across it. Ensure that your swipe motion originates from the edge of the screen. In addition, Your device will instantly capture the screen, and the screenshot will be saved in the Screenshots folder of the Gallery app.
By Using Bixby Voice Assistant – A Vocal Shortcut:
Samsung’s Bixby voice assistant can also help you take screenshots with voice commands. Here’s how: Activate Bixby by pressing and holding the Bixby button or by using a wake-up voice command. State, “Take a screenshot,” and watch as Bixby captures the current screen. So, screenshots can be found in the same Screenshots folder in the Gallery app.
Notification Panel Shortcut – Quick and Accessible:
Using the Notification Panel shortcut is another efficient way to capture screenshots. Follow the steps mentioned below to take screenshots using the Notification Panel: Swipe down from the top of your screen to open the Notification Panel. Spot the Screenshot shortcut and tap it. You just captured the current screen.
The screenshot will be stored in the Screenshots folder within the Gallery app.
Assistant Menu – Ease of Accessibility:
The Assistant Menu offers a floating shortcut to take screenshots easily. You can enable this feature by using the following steps:
Navigate to Settings > Accessibility > Interaction and Dexterity > Assistant Menu and enable the feature.
Access the Assistant Menu by tapping its icon, then select the Screenshot option.
Your screenshot will be saved in the Screenshots folder of the Gallery app.
Smart Select – Tailored Screen Capture:
For more control over your captures, Smart Select is a powerful tool. Furthermore, You can capture specific content with the help of this method:
Open the Edge Panel by swiping from the curved edge of your screen. Locate and tap on Smart Select from the available options. Choose to capture a specific area, create GIFs, and more. Your selected capture will be saved in the Screenshots folder within the Gallery app.
By Using Keyboard Shortcut – Fast and Simple:
You can also take a screenshot using the Power button. A quick keyboard shortcut can save you time and effort. Here’s how:
Press and hold the Power button. While holding the Power button, tap on the Screenshot option from the menu that pops up. So, the screen will be captured instantly, and the screenshot will be stored in the Screenshots folder of the Gallery app.
Using Samsung Capture – A Dedicated Tool:
Samsung Capture provides a specialized approach to take screenshots:
Swipe down from the top of your screen to open the Notification Panel. Locate and tap on the Samsung Capture icon.
Choose your preferred capture type – full screen, partial screen, or GIF. When you will choose a capture type your device will take a screenshot and the captured image will be saved in the Screenshots folder within the Gallery app.
By using Google Assistant – Voice-Powered Screenshot:
Google Assistant can also assist you in taking screenshots through voice commands. With the help of the following steps you can take a screenshot easily through Google Assistant: Activate Google Assistant by either holding the Home button or using a wake-up voice command. State, “Take a screenshot,” and Google Assistant will capture the current screen. Retrieve the screenshot from the Screenshots folder in your Gallery app. Where to Find Your Screenshots: No matter which method you choose, locating your screenshots is a straightforward process: Head to the Gallery app on your Samsung A32 5G. Inside the Gallery app, look for the dedicated Screenshots folder.
Open the folder to access all the screenshots you’ve captured using the various methods mentioned in this guide.
Conclusion:
Your Samsung A32 5G smartphone offers plenty of options for capturing screenshots, ensuring you never miss out on preserving valuable moments or sharing important content. Although you prefer the traditional hardware buttons, the touchless Palm Swipe Gesture, voice commands through Bixby or Google Assistant, or any of the other advanced methods, your device has you covered.
In Addition, the Screenshots folder within the Gallery app serves as a centralized hub for all your captured images, making it simple to access and share them whenever you need. Moreover, use any of these methods and elevate your screenshotting experience to new heights. Here I have explained everything step by step and clearly in easy words. Furthermore, I hope this will be helpful for everyone around the globe and I am sure that you will take more benefit from this hopefully, you will come to know how to take screenshots of the Samsung A32 5G model easily. At last, I would like to say thank you to those who have visited my site.

