How To Take Screenshots On Mac Air?
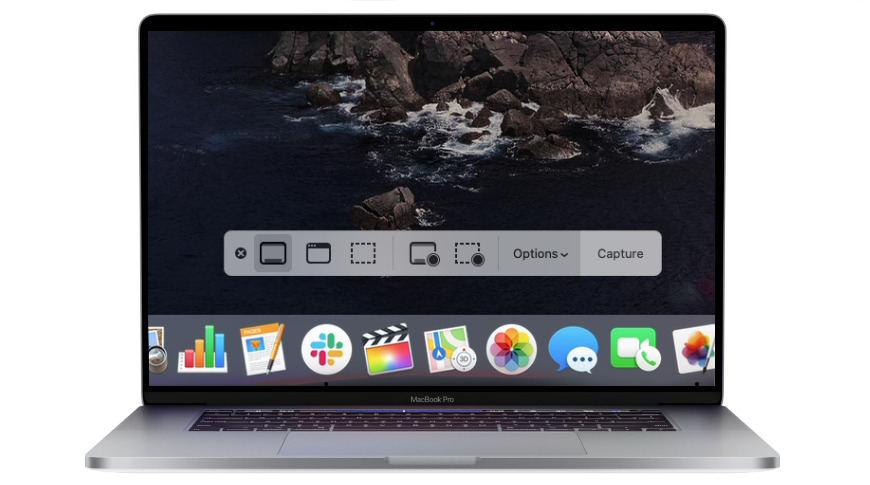
In today’s digital age, capturing and sharing information has become a fundamental part of our lives. Screenshots play a crucial role in this process, allowing us to immortalize moments, document information, and troubleshoot issues. For Macbook Air users, mastering the art of taking screenshots is a valuable skill. This comprehensive guide will explore various methods and techniques on how to take screenshots On a Mac Air.
The MacBook Air, known for its sleek design and powerful performance, offers users a wide range of features, including the ability to capture screenshots with ease. Whether you’re a seasoned Mac user or new to the platform, this comprehensive guide will walk you through the various methods and tricks for taking screenshots on your MacBook Air. By the end of this article, you’ll be a screenshot-capturing expert, able to capture anything from full-screen shots to specific windows and custom selections.
Understanding Screenshot Basics On Mac Air:
Before diving into the specifics, let’s understand why and when you might want to take screenshots on your MacBook Air. Screenshots are a valuable tool for:
Capturing information:
Saving webpages, documents, or error messages for reference.
Sharing content:
Sharing images or text from your screen with others.
Troubleshooting:
Documenting technical issues or bugs for support. Mac Air offers a range of screenshot options to cater to these needs.
Ways To Take Screenshots On Mac Air:
Capturing the Full Screen on Mac OS:
If you are looking for how to take screenshots on a Mac Air, here’s a shorter explanation of capturing the full screen on a MacBook Air:
Capturing the Full Screen On Mac Air:
Capturing the full screen on your MacBook Air is as easy as pressing Shift + Command (⌘) + 3. This universal keyboard shortcut quickly takes a screenshot of everything on your screen, from open windows to your desktop background.
Key Points:
Speed and Simplicity: It’s lightning-fast and ideal for grabbing content swiftly.
Default Saving: Screenshots are saved as PNG files on your desktop, usually named by date and time.
Instant Sharing: Perfect for sharing, attaching to emails, or including in documents.
Basic Editing: You can edit or annotate full-screen screenshots using the Preview application.
Organize Your Screenshots: Consider creating a folder to keep your screenshots organized.
Capturing the full screen is a fundamental and convenient feature, making it a valuable tool for various tasks on your MacBook Air.
How To Take Screenshot Shortcuts With Function Keys On Mac Air:
On some MacBook Air models, you can use dedicated function keys with symbols representing screen capture to take screenshots quickly. Here’s how to use these function keys for screenshot shortcuts:
Find the Screenshot Function Key On Mac Air:
Look for a function key with a camera icon or a symbol that resembles a camera shutter. This key is usually labeled with a camera icon or the abbreviation “PrtSc” (Print Screen).
Press the Screenshot Function Key On Mac Air:
To take a screenshot, simply press the dedicated screenshot function key. It’s usually located among the top row of function keys on your MacBook Air’s keyboard.
Confirm the Screenshot:
After pressing the function key, macOS will capture the entire screen and save it as a file on your desktop. You may hear a camera shutter sound as confirmation.
Accessing the Screenshot On Mac Air:
To access the screenshot, navigate to your desktop. The screenshot file will typically be named “Screenshot [Date] at [Time].png” to help you identify when it was taken.
Additional Functionality (Optional):
Some MacBook Air models might have additional function keys for specific screenshot actions, such as capturing a selected portion of the screen or capturing a specific window. Look for icons or symbols that represent these actions on your function keys.
Important Note About Mac Air:
Please note that not all MacBook Air models have dedicated screenshot function keys. If your MacBook Air doesn’t have these dedicated keys, you can still use the keyboard shortcuts Shift + Command (⌘) + 3 for capturing the full screen or Shift + Command (⌘) + 4 for capturing a selected portion of the screen. These shortcuts are available on all MacBook Air models and provide flexibility in screenshot capture.
Benefits of Taking Screenshots On Mac Air:
Documentation:
Screenshots help save web content, documents, and error messages for future reference.
Communication:
Visual context enhances emails, messages, and documents, making them more informative.
Troubleshooting:
Easily convey technical issues to support teams with visual evidence.
Education:
Screenshots aid teachers and students in capturing educational content and notes.
Creative Projects:
Useful for maintaining design consistency and sharing creative ideas.
Collaboration:
Ideal for remote work and project collaboration, facilitating feedback and understanding.
Presentations:
Enhance presentations by including screenshots to illustrate concepts.
How To Save Screenshots On Mac Air:
Saving a screenshot on your MacBook Air is a straightforward process. After capturing a screenshot, it’s automatically saved to your desktop by default. Here’s a brief overview of how to save a screenshot:
Capture the Screenshot:
Use one of the screenshot methods mentioned earlier (e.g., Shift + Command (⌘) + 3 for a full-screen screenshot or Shift + Command (⌘) + 4 for a selective screenshot).
Screenshot Confirmation:
You may hear a camera shutter sound or see a brief animation when the screenshot is taken.
Locate the Screenshot:
By default, the screenshot is saved as a PNG file on your desktop.
Customization (Optional):
You can customize where your screenshots are saved by going to “System Preferences” > “Screenshots.” From there, you can choose a different folder or location for your screenshots.
In the same preferences menu, you can also change the default screenshot format (PNG) to JPEG, TIFF, or other formats.
That’s it! Your screenshot is saved and ready to be used, shared, or organized. If you want to keep your desktop tidy, consider creating a dedicated folder for screenshots and periodically moving them there for easy access and organization.
How to Edit Screenshots On Mac Air:
Editing a screenshot on your MacBook Air is a straightforward process, and you can use the built-in Preview app for basic editing tasks. Here’s how to edit a screenshot:
Capture a Screenshot:
Use one of the screenshot methods, like Shift + Command (⌘) + 3 for a full-screen screenshot or Shift + Command (⌘) + 4 for a selective screenshot.
Open the Screenshot in Preview:
Locate the screenshot on your desktop or in the folder where it’s saved.
Double-click on the screenshot file to open it in the Preview app.
Edit the Screenshot:
Once the screenshot is open in Preview, you can perform various editing tasks:
Annotate:
Use the annotation tools to draw shapes, add text, highlight sections, or create arrows. These tools are available in the “Markup” toolbar.
Crop:
Select the “Tools” menu, then choose “Crop.” Drag the selection handles to crop the screenshot to your desired size.
Resize: Go to “Tools” > “Adjust Size” to change the dimensions of the screenshot.
Rotate: You can rotate the screenshot using the “Tools” menu as well.
Adjust Colors:
For more advanced edits, including adjusting brightness, contrast, and color balance, go to “Tools” > “Adjust Color.”
Save Your Edited Screenshot:
Once you’re satisfied with the edits, go to “File” > “Save” (or press Command (⌘) + S) to save the edited screenshot. You can save it in its original format or choose a different format if needed.
Keep the Original:
It’s a good practice to keep the original screenshot in case you want to make further edits or refer back to the unedited version.
Window Of Opportunity: Capturing a Specific Window on Mac Air:
Sometimes, you only need to capture a particular window or application:
- Press Shift + Command + 4 to activate the crosshair cursor.
- Next, press the “Spacebar” key.
- Your cursor will change to a camera icon.
- Hover the camera icon over the window or application you want to capture.
- Click the mouse button to take the screenshot.
- The screenshot of the selected window will be saved to your desktop.
- Advanced Editing With Preview In Mac Air:
For those who wish to perform basic edits on their screenshots, follow these steps:
- Locate the screenshot file on your desktop.
- Double-click the file to open it using the Preview application.
- In Preview, you can crop, resize, annotate, and modify your screenshot.
- Once you’ve completed your edits, save the file with the changes.
Conclusion:
Mastering the art of taking screenshots on your Macbook Air opens up a world of possibilities for capturing and sharing information. Whether you need to capture the entire screen, a specific portion, or a single window, these methods empower you to do so efficiently and with ease. Screenshots are invaluable for documenting information, troubleshooting problems, or simply preserving memorable moments on your Macbook Air. So, embrace this skill and start capturing the moments that matter most to you, confident in your ability to do so.


