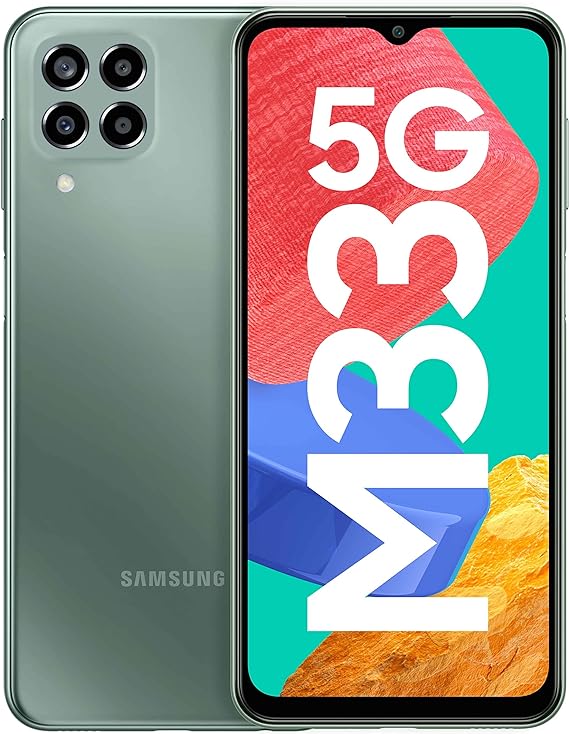
How To Take Screenshots On Samsung M33?
In the fast-paced world of smartphones, the ability to capture a screenshot is a fundamental skill. Whether you want to immortalize a funny conversation or save crucial information, knowing how to take screenshots on your Samsung Galaxy M33 is invaluable. This simple guide will walk you through various methods, ensuring you can effortlessly capture and save what’s on your screen. Imagine stumbling upon a hilarious meme, an inspiring quote, or a vital piece of information, and wanting to keep it for future reference. The Samsung Galaxy M33 offers several user-friendly ways to capture these moments, and mastering this skill will enhance your overall smartphone experience. From traditional button combinations to innovative gestures and voice commands, we’ll explore the diverse methods at your disposal.
By the end of this guide, you’ll be well-equipped to seize those fleeting moments and curate your collection of screenshots on the Samsung Galaxy M33. Let’s delve into the world of screen capturing and unlock the potential of preserving digital memories effortlessly.
Methods To Take Screenshots On Samsung M33:
Taking Screenshots On Samsung M33 By Using Hardware Buttons:
Taking screenshots on the Samsung Galaxy M33 using hardware buttons is a straightforward process. Follow these simple steps:
Locate the Buttons:
Identify the power button and volume down button on the right side of your Samsung Galaxy M33.
Position Your Screen:
open the screen that you want to capture. Make sure all the requirements are visible in the Screenshot.
Press Simultaneously:
Press and hold the power button and volume down button simultaneously. Be sure to press them together for a brief moment.
Capture Confirmation:
You will hear a shutter sound, indicating that the screenshot has been taken successfully. Additionally, a preview of the screenshot may briefly appear on the screen.
Access Your Screenshot:
Open your Gallery or Photos app to find the captured screenshot. It will be stored in the Screenshots folder or a similar location.
Taking screenshots using hardware buttons is a quick and convenient method, making it easy to capture and save moments on your Samsung Galaxy M33.
By using a Palm Swipe Gesture To Take Screenshots On the Samsung M33:
Taking screenshots on the Samsung Galaxy M33 using the Palm Swipe Gesture feature is a hands-free and intuitive method. Follow the below steps:
Enable Palm Swipe:
Go to your device’s “Settings.”
Access Motion and Gestures:
Within “Settings,” select “Advanced features” and then tap on “Motions and gestures.”
Activate Palm Swipe:
Look for the option called “Palm swipe to capture” and toggle the switch to enable this feature.
Navigate to Your Screen:
Position your screen so that the content you want to capture is visible.
Swipe Your Palm:
Extend your hand and swipe the edge of your palm across the screen from right to left or left to right. Ensure your hand makes contact with the screen.
Screenshot Captured:
The screen will be captured, and you may hear a shutter sound. A preview of the screenshot will briefly appear on the screen.
Access Your Screenshot:
Open your Gallery or Photos app to view and share the captured screenshot.
By utilizing the Palm Swipe Gesture feature, you can effortlessly capture screenshots on your Samsung Galaxy M33 without the need to press any physical buttons.
Taking Screenshots On Samsung M33 By Using Assistant Menu:
Capturing screenshots on your Samsung Galaxy M33 using the Assistant Menu provides a convenient and accessible alternative. Read the below steps carefully:
Enable Assistant Menu:
Go to your device’s Settings. Navigate to Accessibility and select Interaction and Dexterity. Look for the “Assistant menu” and toggle the switch to turn it on.
Access Assistant Menu:
A small floating icon will appear on your screen. Tap the icon to open the Assistant Menu.
Navigate to screenshot:
Within the Assistant Menu, locate and tap on the “Screenshot” option. This will capture the current screen.
Capture Confirmation:
The screen will be captured, and you may hear a shutter sound. A preview of the screenshot will briefly appear on the screen.
Find Your Screenshot:
Open your Gallery or Photos app to access the captured screenshot. It should be stored in the Screenshots folder or a similar location.
By Using Bixby Voice Command To Take Screenshots On Samsung M33:
Utilizing Bixby Voice Command to take screenshots on your Samsung Galaxy M33 is a hands-free and efficient method. Follow these steps:
Activate Bixby:
Press and hold the dedicated Bixby button on the side of your device, or say “Hey Bixby” to activate the voice assistant.
Command Bixby:
Once Bixby is activated, say a command such as “Take a screenshot” or a similar phrase indicating your intent to capture the screen.
Capture Confirmation:
Bixby will respond to your command, and the screenshot will be captured. You may hear a shutter sound or receive a confirmation from Bixby.
Access Your Screenshot:
Open your Gallery or Photos app to find and view the captured screenshot.
How To Save Screenshots On Samsung M33?
Saving screenshots on your Samsung Galaxy M33 is an automatic process, but here’s a quick overview of where you can find them:
Access the Gallery or Photos App:
Open the Gallery app (may be labeled as Photos on some devices) on your Samsung Galaxy M33.
Navigate to the Screenshots Folder:
Look for a specific folder named “Screenshots” or a similar name. Screenshots taken on your device are typically automatically sorted and stored in this dedicated folder.
Locate Your Screenshots:
Within the Screenshots folder, you’ll find all the screenshots you’ve taken.
Share or Edit:
Once you’ve located the screenshot you want, you can share it with others, edit it, or use it as needed directly from the Gallery or Photos app.
Remember, the Samsung Galaxy M33’s default behavior is to save screenshots in the Screenshots folder, making it easy for you to find and manage your captured images.
What Are The Advantages Of Taking Screenshots On Samsung M33:
Taking screenshots on your Samsung Galaxy M33 offers several advantages, enhancing your overall user experience:
Memorable Moments:
Capture and preserve memorable moments, such as funny text conversations, important notifications, or achievements, to revisit later.
Information Preservation:
Save crucial information, including addresses, contact details, or important messages, for future reference.
Troubleshooting and Support:
Capture error messages or technical issues on your device to provide accurate information when seeking troubleshooting assistance or support.
Shareable Content:
Easily share screenshots with friends, family, or colleagues to convey specific information, show interesting content, or seek advice.
Visual Communication:
Use screenshots to visually communicate information, instructions, or visual elements from apps or websites.
Documentation:
Create a visual record of transactions, receipts, or any on-screen information that you may need for documentation purposes.
Conclusion:
In conclusion, mastering the art of taking screenshots on your Samsung Galaxy M33 opens up a world of convenience and possibilities. Whether you’re preserving cherished moments, saving important information, or troubleshooting device issues, the various methods available cater to your diverse needs. The straightforward use of hardware buttons, the hands-free approach with Palm Swipe Gesture, the accessibility provided by the Assistant Menu, and the voice-activated efficiency of Bixby Voice Command all contribute to a seamless experience. With each screenshot, you capture not just an image but a piece of your digital life, ready to be revisited, shared, or used for reference. Embrace these simple yet powerful techniques to make the most of your Samsung Galaxy M33’s capabilities.


