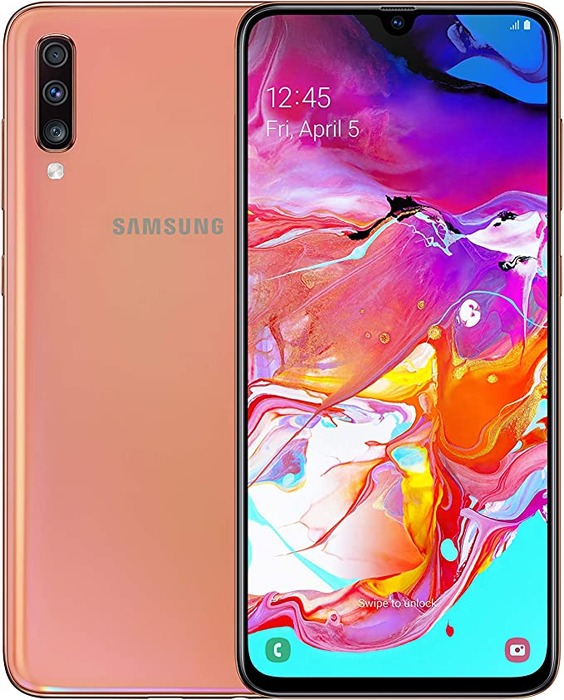
How To Take Screenshots On Samsung Galaxy A70?
Capturing the essence of a moment or preserving important information has become second nature in our digital age. If you are a proud owner of the Samsung Galaxy A70, then knowing How to take screenshots of the Samsung Galaxy A70 is a skill that can significantly enhance your smartphone experience. In a world where visuals speak volumes, being able to effortlessly capture what’s on your screen is a valuable tool. The Galaxy A70 offers multiple methods to seize memorable memes, save crucial details, or troubleshoot issues with ease. From classic button combinations that echo the simplicity of traditional photography to innovative gestures and smart features like Scroll capture, this guide will unravel the diverse ways to capture screenshots on your Samsung Galaxy A70.
Whether you are a tech enthusiast or a casual user, understanding these methods unlocks a realm of possibilities, enabling you to share, save, and document moments at the tap of your fingertips. Let’s embark on a journey to unveil the secrets of screenshot mastery on the Samsung Galaxy A70.
Taking Screenshots On Samsung Galaxy A70 By Using Classic Button Combination:
Taking screenshots on your Samsung Galaxy A70 using the classic button combination is a simple process. Read the below instructions carefully:
Identify the Buttons:
Locate the Volume Down button, usually found on the left side of your device, and the Power button, typically situated on the right side.
Prepare the Screen:
Go to the screen which you are going to capture. Make sure that everything you want in the screenshot is visible on your display.
Press the Buttons Simultaneously:
Press and hold these buttons at the same time. Hold them down for a brief moment, usually until you see a visual or hear a shutter sound which shows a screenshot has been taken.
View and Share:
The screenshot is automatically saved in your gallery. You can access it through the Gallery app or the Photos app. From there, you can also share the Screenshots.
Using the classic button combination is a quick and reliable method to capture screenshots on your Samsung Galaxy A70.
Taking Screenshot On Samsung Galaxy A70 By Using Smart Capture Method:
Here’s how you can use Smart Capture on your Galaxy A70:
Take a Screenshot:
Use the classic button combination of pressing and holding the Volume Down button and the Power button simultaneously to capture a screenshot.
Access Smart Capture:
After taking the screenshot, you will notice a toolbar at the bottom of the screen. Tap on ‘Scroll capture’ to access the Smart Capture features.
Scroll Capture:
Smart Capture allows you to capture more than what’s visible on the current screen. Tap on ‘Scroll capture’ to extend the screenshot, capturing additional content that might be below the initial view.
Adjust and Save:
Scroll down to capture more content if needed. Once satisfied, tap ‘Done’ or a similar option to save the extended screenshot.
Smart Capture on the Samsung Galaxy A70 is a handy feature, especially when you need to capture entire content.
Utilizing The Edge Panel Method For Taking Screenshots On Samsung Galaxy A70:
This method is a convenient and efficient way to capture the screen on your Samsung Galaxy A70. Read the below simple steps carefully:
Enable Edge Panels:
Go to your device’s Settings, then select ‘Display.’ Look for the Edge screen and tap on it. Toggle on the switch next to ‘Edge panels’ to enable the Edge Panel feature.
Configure Smart Select:
Within the Edge screen settings, find and tap on ‘Edge panels’ again. Look for the ‘Smart Select’ panel and make sure it is activated.
Access the Edge Panel:
Swipe in from the edge of your screen to open the Edge Panel. The handle, usually on the right side, can be dragged to the center to reveal the available panels.
Choose Smart Select:
Locate the ‘Smart Select’ panel within the Edge Panel. Tap on it to open a menu with options for rectangular, oval, or animated screenshots.
Capture the Screenshot:
Select the type of screenshot you want then adjust the frame as needed, and tap Done or the checkmark icon to capture the screenshot.
Save and Share:
The captured screenshot is automatically saved, and you can share, edit, or manage your screenshots.
Utilizing the Edge Panel method adds a layer of accessibility to your screenshot-taking experience on the Samsung Galaxy A70.
Taking Screenshots On Samsung Galaxy A70 By Using Assistant Menu Method:
Using the Assistant Menu for taking screenshots on the Samsung Galaxy A70 provides an accessible and efficient way to capture your screen. Here’s a step-by-step guide:
Enable Assistant Menu:
Go to your device’s Settings. Select ‘Accessibility’ then Look for ‘Interaction and dexterity’ or a similar option. Tap on the ‘Assistant menu’ and toggle the switch to enable it.
Access the Assistant Menu:
Once Assistant Menu is enabled, a small menu icon will appear on your screen. This icon is usually represented by a white circle with a square inside. Tap the Assistant Menu icon to open the menu.
Navigate to Screenshots:
Within the Assistant Menu, you will find various options. Look for a Screenshot or a similar option.
Capture the Screenshot:
Tap on ‘Screenshot’ to capture the current screen.
Access and Share:
The screenshot will automatically save in your gallery. Open your device’s Gallery app to view and manage the captured screenshots. From there, you can share as well.
This method is particularly useful for users who may find physical button combinations challenging or prefer a more accessible approach.
By Utilizing The Quick Settings Tile Method To Take Screenshots On Samsung Galaxy A70:
The Quick Settings Tile method offers a convenient way to take screenshots on your Samsung Galaxy A70. Here’s how to utilize this method:
Open Quick Settings:
Swipe down from the top of your screen to access the Quick Settings panel.
Edit Quick Settings:
Look for an Edit or More options icon in the Quick Settings panel. Tap on it to enter the editing mode.
Add Screenshot Tile:
Find the ‘Screenshot’ tile in the available options. Hold and drag the Screenshot tile to your active tiles area in the Quick Settings panel.
Capture the Screenshot:
Once you have added the Screenshot tile, it will appear in your Quick Settings. Click on the screenshot.
Access and Share:
The screenshot will automatically save in your gallery. From there, you can share, edit, or delete the screenshots as needed.
Using the Quick Settings Tile method simplifies the process of taking screenshots on the Samsung Galaxy A70.
Taking Screenshots On Samsung Galaxy A70 By Using Bixby Voice Command:
To give a voice command for taking screenshots on your Samsung Galaxy A70 using Bixby Voice, follow these steps:
Ensure Bixby Voice is Enabled:
Open the Bixby Home by pressing the Bixby button or swiping right on the home screen. If prompted, sign in or create a Samsung account to use Bixby services.
Set Up Voice Wake-Up:
In the Bixby Home, tap the three vertical dots in the top right corner to access Bixby settings. Find and select Settings, then tap on Voice wake-up. Enable the voice wake-up feature and follow the on-screen instructions to set up your voice.
Use the Voice Command:
Once voice wake-up is set up, you can activate Bixby by saying, ‘Hey Bixby.’ After activating Bixby, give the voice command ‘Take a screenshot.’
Confirm or Adjust:
Bixby will confirm that a screenshot is taken with a voice response or sound.
Access and Share:
The screenshot is automatically saved in your album. Open your device’s Gallery app to view and manage the captured screenshots. From there, you can share, edit, or delete the screenshots as needed.
By utilizing Bixby Voice, you can take screenshots hands-free on your Samsung Galaxy A70.
Conclusion:
In summary, taking screenshots on your Samsung Galaxy A70 is a simple yet powerful skill that adds versatility to your smartphone experience. Whether using the classic button combination, innovative gestures, or smart features like Scroll capture, the Galaxy A70 provides a range of options to suit your preferences. The ability to effortlessly capture and share moments, save essential information, or troubleshoot issues is at your fingertips. With methods like the Edge Panel and Assistant Menu adding accessibility, and voice commands through Bixby enhancing convenience, you are now equipped to master the art of screenshot taking on your Galaxy A70, unlocking new possibilities for sharing and preserving your digital experiences.


