
How To Take Contacts Backup In iPhone?
In this modern era, our smartphones have become an important part of our most cherished connections – our contacts. Losing these contacts due to an unexpected mishap or device change can be a headache. Fortunately, Apple recognizes the importance of safeguarding your valuable contact information, and they’ve made it relatively straightforward to do so on an iPhone. Moreover, in this comprehensive guide, we will walk you through the process of How To Take Contacts Backup On your iPhone, breaking it down into simple steps. Whether you’re a tech novice or a seasoned iPhone user, you’ll find the methods outlined here accessible and effective. By the end of this article, you’ll have the knowledge and tools to ensure that your precious contacts are securely backed up, ready to be restored whenever you need them. So, let’s read in and learn how to Backup Contact In iPhone.
How To Take Contact’s Backup On iPhone Using iCloud?
Enable iCloud Contacts:
- Open Settings on your iPhone.
- Tap your Apple ID at the top.
- Select “iCloud.”
- Toggle on “Contacts.”
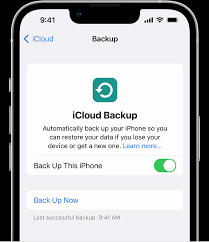
Manual Contact’s Backup:
- After enabling iCloud Contacts, your contacts will be automatically backed up.
- To manually trigger a backup, scroll down and tap “Backup.”
Restoring Contacts From iCloud:
- In case you lose your contacts, you can restore them from an iCloud backup.
- Open Settings, tap your Apple ID, select “iCloud,” and turn on “Contacts” if it’s not already enabled.
- Scroll down and tap “Restore Contacts.”
Take Contact Backup On iPhone Using third-party Apps
Using a third-party backup app provides an easy way to safeguard your iPhone contacts, ensuring they’re accessible whenever you need them, follow the mentioned steps to take contact backup on iPhone Easley;
Select a Third-Party Backup App:
Choose a third-party backup app from the App Store, like “My Contacts Backup” or “Contacts Backup & Transfer.
Install and Open the App:
Download and launch the chosen app on your iPhone.
Grant Contact Access:
Allow the app access to your contacts when prompted.
Create a Backup:
Look for the “Backup” or “Create Backup” option within the app.
Follow the On-Screen Steps:
The app will guide you through the backup process.
Wait for Backup Completion:
Wait for the app to finish creating the backup.
Verify and Store Backup:
Confirm the backup’s completion and choose how to store it, such as saving it as a .vcf file or sending it to your email.
Secure the Contact’s Backup:
Keep the backup file in a secure location, such as cloud storage or your computer.
Restoring Contacts (if needed):
If you need to restore contacts from the backup, follow the app’s instructions for the restoration process.
Export Contacts:
Typically, these apps allow you to export your contacts as a .vcf file.
You can then save this file to cloud storage, email it to yourself, or transfer it to your computer for safekeeping.
How To Take Contact Backup On iPhone Using iTunes:
Taking a contact backup on your iPhone using iTunes involves creating a full device backup, which includes your contacts along with other data. Here’s a step-by-step guide;
Connect Your iPhone to Your Computer:
Connect your mobile phone to a computer with a USB cable with iTunes installed.
Open iTunes:
Launch the iTunes application on your computer if it doesn’t open automatically when your iPhone is connected.
Select Your Device:
In iTunes, your connected iPhone should appear as an icon or device name in the upper left corner of the iTunes window. Click on it to select your device.
Start the Contact’s Backup:
Under the “Summary” tab for your device, you’ll see a section labeled “Backups.” Choose “This computer” to ensure the backup is stored on your computer.
Now you just have to click on back up now so the backup process will start automatically.
Wait for the Backup to Complete:
iTunes will start backing up your entire iPhone, including your contacts. It totally depends on the data you have on your device if you have a large data then it will take more time to back up your data.
Verify the Backup:
One the backup is finished, you can check its completion status under “Latest Backup” in the “Summary” tab.
Secure the Contact’s Backup:
The backup files are now saved on your computer. To locate them, you can go to iTunes Preferences > Devices (on macOS) or Edit > Preferences > Devices (on Windows). Here, you’ll see a list of your backups, including the date and time they were created.
By following these steps, you’ve successfully taken a backup of your iPhone, including your contacts, using iTunes. This backup can be used to restore your contacts and other data in case of data loss or when setting up a new iPhone.
How To Take Contacts Backup on iPhone With Your Email Account:
To make contact backup on an iPhone is very simple you just have to follow the simple steps mentioned below;
- You can sync your iPhone contacts with email services like Gmail or Outlook.
- Go to Settings > Passwords & Accounts > Add Account, and select your email service.
- Enable the “Contacts” option to sync your contacts.
Access Contacts from Any Device:
By syncing your contacts with your email account, you can access them from any device with an internet connection. Additionally, accessing your iPhone contacts from any device is a convenient feature that can be done by syncing your contacts with an email service like Gmail, Outlook, or iCloud. This ensures that your contact information is not tied exclusively to your iPhone and can be easily accessed from various platforms such as other smartphones, tablets, or even computers. So, Here’s how you can access your iPhone contacts from any device;
Sync Contacts With Your Email Account:
- Go to your iPhone’s “Settings.”
- Scroll down and select “Passwords & Accounts.”
- Tap “Add Account.”
- Choose your preferred email service (e.g., Gmail, Outlook, or iCloud) and enter your login credentials.
- Ensure that the “Contacts” toggle is turned on or enabled.
Access Contacts from Webmail (e.g., Gmail or Outlook):
- Once you’ve synced your iPhone contacts with an email account, you can access them through the webmail interface of that service. For instance:
- If you’re using Gmail, visit the Gmail website (mail.google.com) and log in with your Google account. Click on the “Google Apps” (nine-dot) icon, and select “Contacts” to view your synced contacts.
Conclusion:
In conclusion, safeguarding your iPhone contacts through backups is a prudent practice that ensures you never lose access to your valuable connections. Whether you choose to use Apple’s built-in iCloud and iTunes solutions or opt for the flexibility of third-party backup apps, taking control of your contact data is essential.
Regular backups offer peace of mind, protecting your contacts from unexpected mishaps, device upgrades, or data loss scenarios. By syncing your contacts with iCloud, you can seamlessly store them in the cloud, accessible from any Apple device. iTunes provides a comprehensive backup that includes contacts, allowing for easy restoration when needed.
Third-party backup apps offer a user-friendly alternative, simplifying the process and often providing export options for added security. Furthermore, plus, syncing your contacts with email services ensures cross-platform compatibility, allowing you to access your contacts from various devices and web interfaces.
The choice of method depends on your preferences and needs, but the underlying principle remains the same: safeguarding your contacts is a smart move in our digitally connected world. Don’t wait until an unexpected event prompts you to search for lost contacts. Take action now to ensure that your digital address book is secure and easily accessible whenever and wherever you need it. Your connections are valuable; protect them with regular contact backups.


