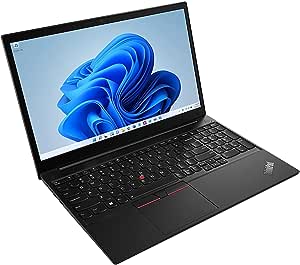
How To Take Screenshots On ThinkPad?
Capturing screenshots on your ThinkPad is a fundamental skill that adds versatility to your computing experience. In an era where visual communication is paramount, knowing how to seamlessly capture and share what’s on your screen can be a game-changer. Whether you’re highlighting a crucial detail in a project, troubleshooting an issue, or simply preserving a memorable moment, mastering the art of taking screenshots is a valuable asset.
In this digital age, where a picture is worth a thousand words, the ability to efficiently capture your ThinkPad’s display is indispensable. The process may seem straightforward, but understanding the various methods and shortcuts available can significantly enhance your workflow. From the conventional Print Screen key to the more advanced features like Snipping Tool and Snip & Sketch, each method caters to different needs. Join us on a journey through the diverse techniques, ensuring that you can effortlessly capture, save, and share what matters most on your ThinkPad. Elevate your computing experience by unlocking the power of screenshots with these intuitive methods.
Taking Screenshots On Thinkpad By Using the Print Screen Key (PrtSc):
Taking screenshots on your ThinkPad using the Print Screen key (PrtSc) is a straightforward process. Follow these simple steps to capture either the entire screen or just the active window:
Locate the Print Screen Key:
Identify the “PrtSc” key on your ThinkPad’s keyboard. It’s typically located in the top row, often near the right end.
Capture the Entire Screen:
Press the “PrtSc” key to capture the entire screen.
Capture the Active Window:
If you only want to capture the active window, press “Alt + PrtSc” simultaneously. This captures only the window you’re currently working in.
Paste and Save:
Open an application like Paint, Word, or any image editor of your choice. Press “Ctrl + V” to paste the screenshot from your clipboard. Save the image in your preferred location.
Using the Print Screen key is a quick and efficient way to capture your ThinkPad’s screen content. Whether you need to share information, document details, or troubleshoot, mastering this basic method will prove invaluable in various computing scenarios.
Taking Screenshots On Thinkpad By Utilizing Snipping Tool:
Utilizing the Snipping Tool on your ThinkPad provides a more versatile way to capture screenshots, allowing you to select specific areas of the screen. Here’s a step-by-step guide:
Access the Snipping Tool:
Open the Start menu and search for “Snipping Tool.” Click on the application to launch it.
Choose Snip Type:
Within the Snipping Tool, you can select the type of snip you want: Free-form, Rectangular, Window, or Full-screen.
Capture the Screen:
After choosing your snip type, use your mouse to select the area of the screen you want to capture.
Edit and Annotate:
The Snipping Tool provides basic editing and annotation features. You can use the pen, highlighter, and eraser tools to enhance your screenshot.
Save the Snip:
Once you’re satisfied with the captured content, click on “File” and select “Save As” to save the snip in your preferred location.
By using the Snip & Sketch Method To Take Screenshots On Thinkpad:
Using the Snip & Sketch method on your ThinkPad is a convenient way to capture and annotate screenshots. Follow the below steps:
Open Snip & Sketch:
Press “Windows + Shift + S” on your keyboard. This will open the Snip & Sketch snipping bar at the top of your screen.
Select the Area to Capture:
Click and drag to select the specific area of the screen you want to capture. The selected portion will be copied to your clipboard.
Annotate and Edit:
Once the screenshot is captured, a notification will appear. Click on the notification to open the Snip & Sketch app, where you can annotate and edit the screenshot with tools like a pen, pencil, and highlighter.
Save or Share the Snip:
After making any desired annotations, click on the disk icon to save the snip. You can also use the Share option to send the screenshot directly to other applications.
The Snip & Sketch method provides a quick and flexible way to capture and edit screenshots on your ThinkPad.
Using the Snipping Tool Shortcut To Take Screenshots On Thinkpad:
Creating a Snipping Tool shortcut on your ThinkPad’s desktop provides quick access to this handy screenshot tool. Here’s how you can set up and use the Snipping Tool Shortcut:
Create the Shortcut:
Right-click on your desktop and select New. Choose “Shortcut” from the menu.
Name the Shortcut:
Enter a name for the shortcut, such as “Snipping Tool,” and click “Finish.”
Access the Snipping Tool:
Double-click on the newly created shortcut icon to open the Snipping Tool.
Choose Snip Type:
Within the Snipping Tool, select the type of snip you want: Free-form, Rectangular, Window, or Full-screen.
Capture the Screen:
After choosing your snip type, use your mouse to select the area of the screen you want to capture.
Edit and Save:
The Snipping Tool provides basic editing options. You can annotate the screenshot using the pen, highlighter, and eraser tools.
This method is particularly convenient when you frequently need to capture and save screenshots with a customized selection.
How To Take Screenshots On Thinkpad By Using Windows + Print Screen:
Taking screenshots on your ThinkPad using the Windows + Print Screen shortcut is a quick and efficient method. Read the below steps carefully:
Ready the Screen:
Arrange the content on your ThinkPad’s screen that you want to capture.
Press Windows + Print Screen:
Simultaneously press the “Windows” key and the “Print Screen” key. On some keyboards, you might need to use “Windows + Fn + Print Screen.”
Capture and Save:
The screen will momentarily dim, indicating that the screenshot has been captured. The screenshot is automatically saved as an image file in the Screenshots folder.
Access the Screenshot:
To view your captured screenshot, open the File Explorer navigate to Pictures, and then Screenshots.
How To Save Screenshots On Thinkpad?
Saving screenshots on your ThinkPad is a simple process. Once you’ve captured a screenshot using your preferred method, you can save it using the following steps:
Capture a Screenshot:
Use one of the methods mentioned earlier, such as using the Print Screen key, Snipping Tool, Snip & Sketch, or Windows + Print Screen, to capture the desired screenshot.
Open an Application:
Open an application where you can paste or edit images. Common choices include Paint, Microsoft Word, or image editing software.
Paste the Screenshot:
Press “Ctrl + V” to paste the screenshot into the application. Alternatively, right-click and select “Paste.”
Edit or Annotate:
If needed, you can edit or annotate the screenshot using the tools provided by the application.
Save the Screenshot:
After making any necessary edits, click on “File” and select “Save” or “Save As” depending on the application. Choose the location where you want to save the screenshot, enter a file name, and select an image format (e.g., JPEG, PNG).
Navigate to the Saved Location:
Open the file explorer and navigate to the location where you saved the screenshot to ensure it was saved successfully.
Following these steps allows you to efficiently capture, edit, and save screenshots on your ThinkPad for various purposes, from documentation to sharing information with others.
What Are the Advantages Of Taking Screenshots On Thinkpad:
Taking screenshots on your ThinkPad offers several advantages for both personal and professional use. Here are some key benefits:
Documentation and Troubleshooting:
Screenshots serve as visual documentation, allowing you to capture and preserve information.
Communication and Collaboration:
Screenshots are effective tools for communicating visually. Whether you’re explaining a process, demonstrating software features, or providing feedback.
Training and Tutorials:
Screenshots are invaluable for creating step-by-step tutorials or training materials.
Presentation Enhancement:
In presentations or reports, screenshots can enhance your content by providing visual examples, graphs, or illustrations.
Memorabilia and Memories:
Screenshots allow you to capture moments on your ThinkPad, such as achievements, messages, or images.
Conclusion:
In conclusion, learning how to take screenshots on your ThinkPad opens up a world of possibilities. It’s not just a simple task; it’s a skill that can make your computer use more efficient and enjoyable. Whether you choose the traditional Print Screen key, the versatile Snipping Tool, or the convenient Windows shortcuts, each method empowers you to capture and share information effortlessly. Screenshots are more than just images; they are tools for communication, documentation, and creativity. So, explore these methods, find what suits your needs, and embrace the power of capturing moments and information with just a few simple clicks on your ThinkPad.


